Tuesday, 12 January 2010

Local Craft Fair

Here are a few images of a craft stall I shared with my Nan at the local Marsh Mill Craft Village, it was great fun and also a lot of hard work just near christmas!
Fingerless Gloves ....


Chunky scarf made on my giant wooden needles :)


Christmas decs and frames art work


My Nan made these lovely dolls and baby cardigans...


Custom made bows for headbands and hair clips.....


My cousins doing a little modelling for me :) ... Kaitlin ^ and Kirby.


Handmade christmas cards with embroidered detail.....






Sunday, 27 September 2009

I eventually have some work for sale online! Please follow the link to see......
It's just wall art at the moment, but there will be lots more to come including furniture and textile accessories.

Thursday, 10 September 2009

My personal revamps... made for me!

I was given an old mirror, which was a yellowish gold colour, I resprayed it pink to clash with my soft green walls.

These shelves were dark brown before I muliticoloured them! a little bold but I love bright colours, and couldnt decide which colour to go for.


I found the perfect poster in hmv, Jimmy Hendrix sits nicley along side my shelves.


I also spray painted my brothers bin and washing basket which he left when he moved out.


These curtains and cushions I made from fabric which I bought.


I found this fabric in the cut offs in a material shop, this was the last of it. I loved the pattern but there wasnt enough in one colour for me to make a pair of curtains, so I made one in each colour!
The loops at the top I mixed up so the colours were carried over to both sides.
My mirror and candlestick.

The cushions I made with the left over fabric from my curtains.


This candle stick I found at a charity shop, it was bronze and rusty in places, so I resprayed it in pink to match my mirror.


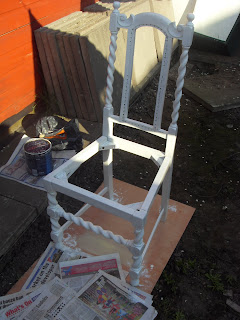
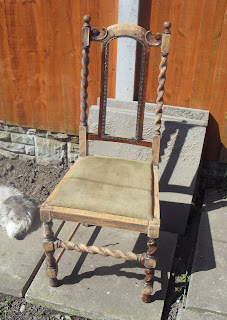
Process of refurb.....

Painting :)


Before sanding, I removed the whicker from the back panel.


Painted frame.


Sanded frame.

Sanded surface.


Broken whicker! In the auction room here, where I first spotted them.
The order is a little confising here, but these pics are to give an idea of the refurbishment process, and ofcourse to show what condition it was in before I got my hands on it.


Wednesday, 15 July 2009

At New Designers in London


Honours Project


I have designed surface patterns for chairs, these i have refurbished myself by simply sanding down and repainting the wood.
I have experimented with different paints and surfaces for printing, the pink sample shown above is paper which i then stitched.
My final designs shown on my two chairs are screen printed and free machine embroidered.
I really enjoyed the process of refurbishment, I love the idea of taking something old and making it new. Its like creative recycling, these chairs i managed to salvage from an antiques sale, they werent in very good condition so when they didnt sell, they were going to be thrown in the tip!!
I will find my images of the chairs before hand and upload them so you can see the whole transformation.


Wednesday, 10 June 2009

ceramics elective


In my second year I took an independant elective in ceramics. I explored the idea of mixing textiles with clay. Instead of using a glaze on the surface, I used textiles to cover my pots.

This idea of interperting textiles into my ceramics work came from some ceramics work I did in my first year. Our class took a mixed crafts elective in which we had to design an item of jewellery......


The textiles are not seen here as they were inside the clay. I used lengths of wools and fabrics dipped in slip (liquid clay) and wrapped them around circles which I cut out of clay. When the circles are put into the kiln, the textiles fibres are burned away leaving the textures imprinted in the clay which was surrounding the wool and material. I then added a glaze before firing a second time. Finally I simply strung the circles together using string.